# 本文收获与价值
看完本系列文章后你将能够做出如下100%还原携程 V8.22.0 首页 GridNav 的界面:

# 准备工作
开始前请
按照Flutter实现携程GirdNav布局_准备工作中的步骤完成准备工作;
按照Flutter实现携程GirdNav布局_整体布局中添加相关代码;
注: 以下全部代码改变都在grid_widget.dart文件中机进行;
# 实现hotel行的布局
将
// todo: add hotel row替换为child: Row( children: <Widget>[ // todo: add hotel row items ], ),在
Widget _travelRow(){...函数下面添加如下代码实现// todo: add imageUrl, imgWidth,title. Widget _firstBGimageStack() { return Expanded( child: FractionallySizedBox( widthFactor: 1, heightFactor: 1, child: Stack( alignment: Alignment.bottomRight, children: <Widget>[ _bgImagePositioned( _hotelBGImageUrl, width: imgWidth, ), _firstTitlePositioned('酒店'), ], ), ), flex: 31, ); } Widget _firstTitlePositioned(String title) { return Positioned( left: 15, top: 25, child: Text( title, style: _titleStyle, ), ); } Widget _bgImagePositioned(String imageUrl, {double width = 73}) { return Positioned( child: Image.network( imageUrl, width: width, fit: BoxFit.fill, ), ); }注意:
_firstBGimageStack中的flex: 31是根据网页端的flex布局的比例来的,下文中flex: 23和flex 46等均是如此;FractionallySizedBox(widthFactor: 1,heightFactor: 1)是用来撑满父节点整个布局空间用的,widthFactor: 1代表比例表示占满宽,heightFactor: 1表示占满高度;
将如下代码添加到
// todo: add hotel row items的下方_firstBGimageStack(),保存更改
cmd+s,界面热更新如下
<img width=375 src="https://github.com/gitKun/ctrip_gird_demo/blob/master/screenshort/step3_add_firstStack.png?raw=true" />在
Widget _bgImagePositioned(){...函数下方添加第二列带有背景图的Stack布局代码(包括添加左边框):// todo: add imageUrl, imgWidth,title. Widget _secondBGImageStack() { return Expanded( child: FractionallySizedBox( widthFactor: 1, heightFactor: 1, child: Container( decoration: BoxDecoration( border: Border( left: _borderSide, ), ), child: Stack( alignment: Alignment.bottomLeft, children: <Widget>[ _bgImagePositioned( _minsuBGImageUrl, width: 37, ), _commonTitle('民宿·客栈'), ], ), ), ), flex: 23, ); } Widget _commonTitle(String title) { return Center( child: Text( title, style: _titleStyle, ), ); }在
_hotelRow()方法的// todo: add hotel row items的下方添加_secondBGImageStack(),,cmd+s保存后热更新界面如下:
添加
platform视图的布局代码,在Widget _commonTitle(String title){...函数下方添加如下代码:Widget _platformBGImageStack() { return Expanded( child: FractionallySizedBox( widthFactor: 1, heightFactor: 1, child: Container( decoration: BoxDecoration( border: Border( left: _borderSide, ), gradient: LinearGradient(colors: _platformColors), ), child: Stack( alignment: Alignment.bottomRight, children: <Widget>[ _bgImagePositioned(_platformBGImage, width: 86), _platformTitle('机票/火车票+酒店 '), // todo: add platform tag ], ), ), ), flex: 46, ); } Widget _platformTitle(String title) { return Center( child: Text( title, style: _platformStyle, ), ); }在
_hotelRow()方法的// todo: add hotel row items下方添加_platformBGImageStack(),cmd+s保存并热跟新后界面如下:
实现
方便又便宜的布局,在Widget _platformTitle(String title) {...函数的下方添加如下代码Widget _platformTagTilte(String title) { return Center( child: Padding( padding: EdgeInsets.only( bottom: 32, left: 38, ), child: Container( decoration: BoxDecoration( color: Color(0xfff54c45), borderRadius: BorderRadius.only( topLeft: Radius.circular(7), topRight: Radius.circular(7), bottomRight: Radius.circular(7), ), ), padding: EdgeInsets.fromLTRB(5, 0, 5, 0), child: Text( title, style: TextStyle( color: Color(0xffffffff), fontSize: 12, fontWeight: FontWeight.w600, ), ), ), ), ); }然后将
// todo: add platform tag替换为_platformTagTilte('方便又便宜'),随后cmd+s保存并热跟新后界面效果如下: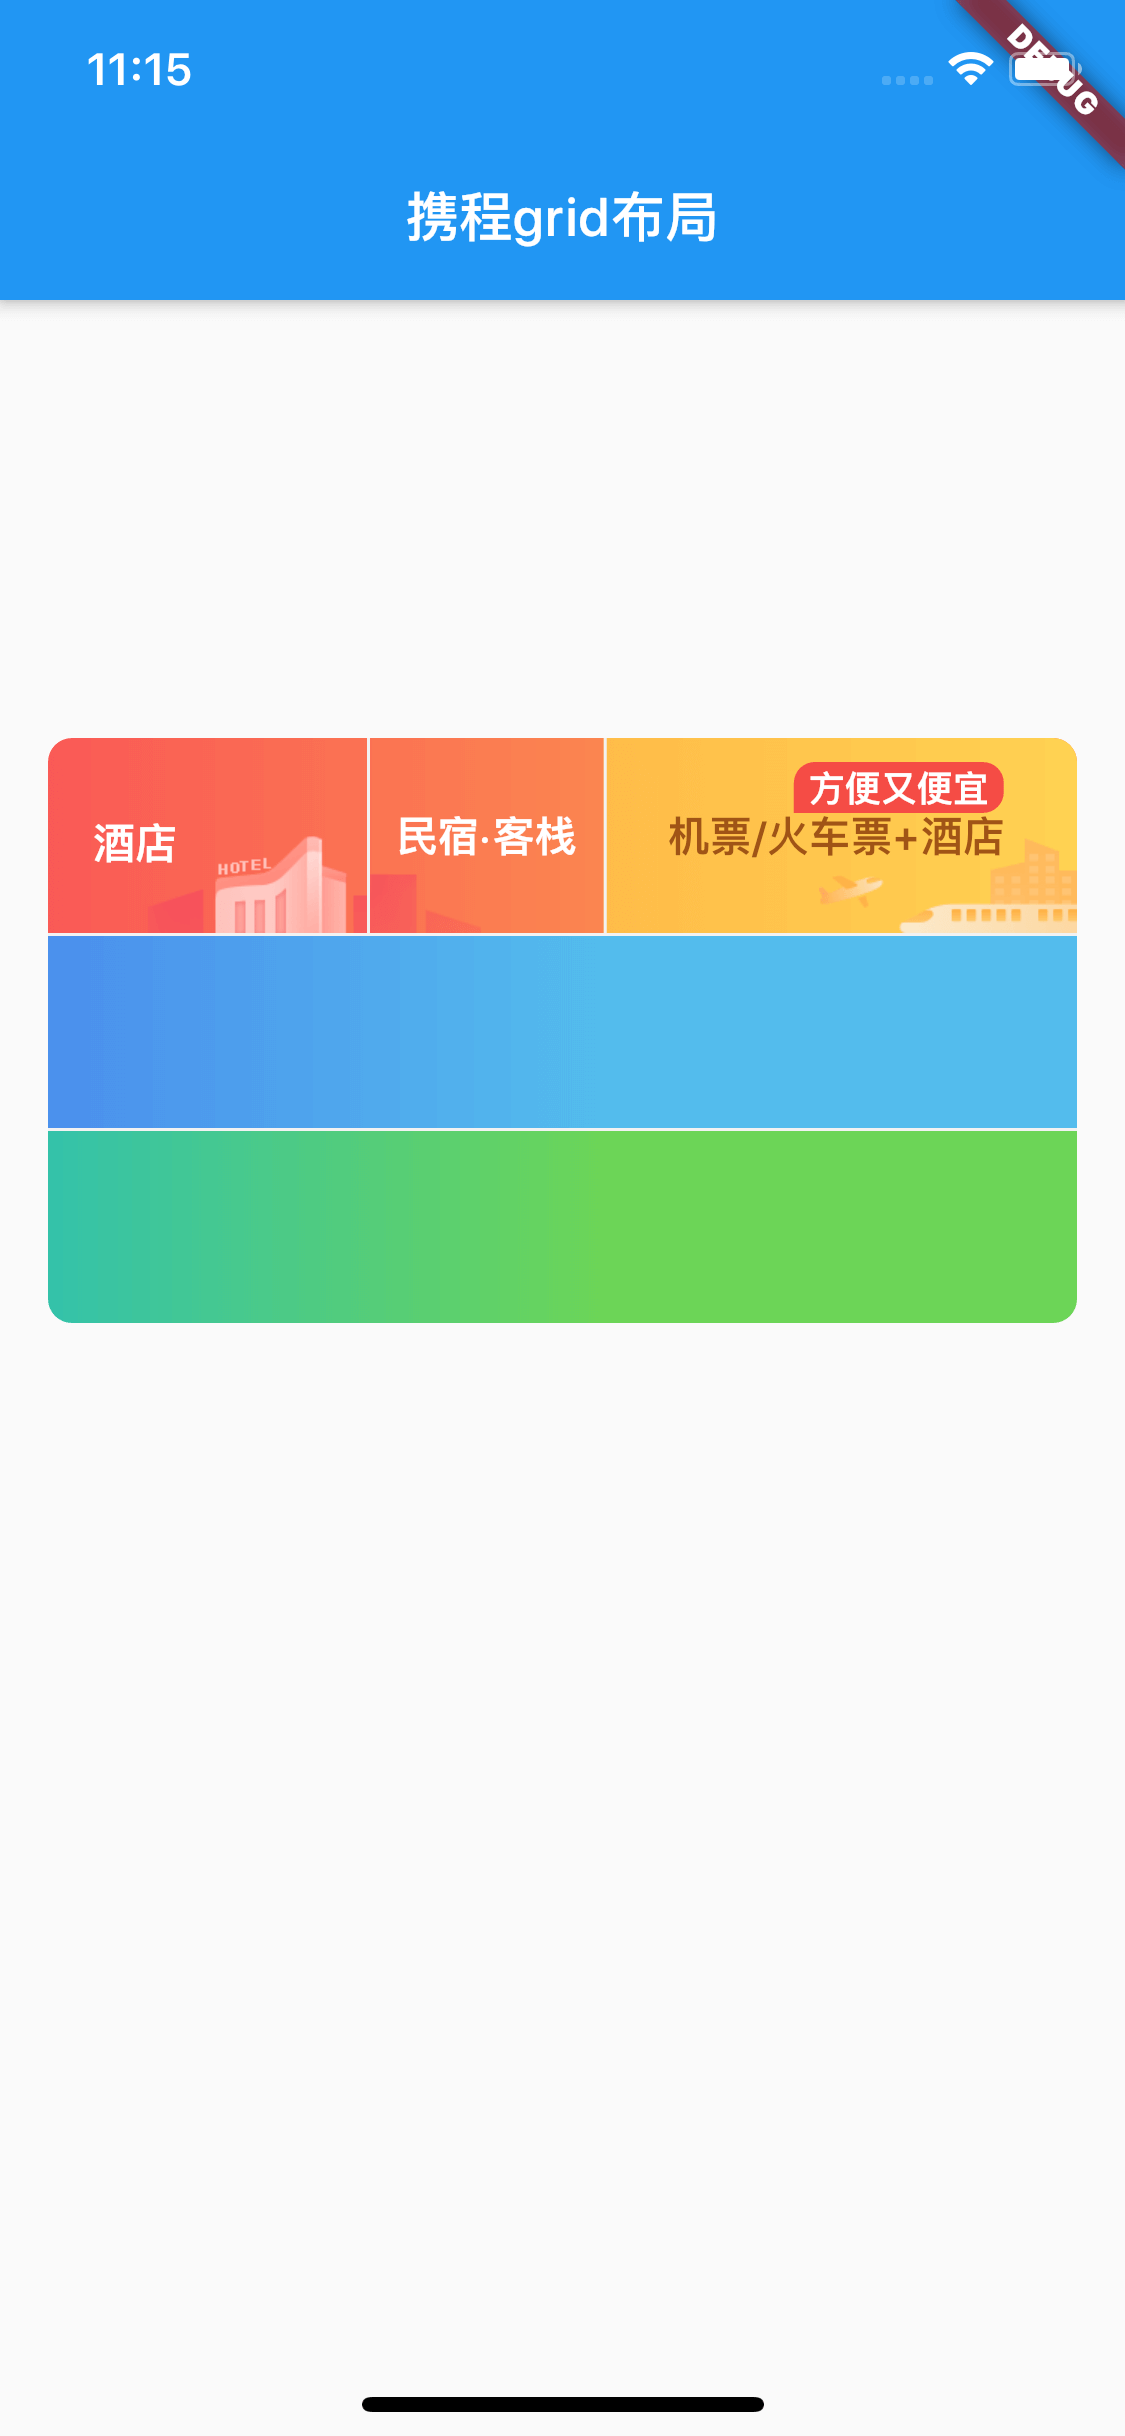
至此 hotel 行的布局全部完成🎉
# 完成 flightRow 和 travelRow
前面我们已经封装好了 _firstBGimageStack 和 _secondBGImageStack 函数,这里我们给他们添加必要的参数就能实现背景图和标题的更换,现在开始动手吧:
将备注
// todo: add imageUrl, imgWidth,title.的Widget _firstBGimageStack(){正行代码,替换为如下:Widget _firstBGimageStack({ @required String imageUrl, double imgWidth = 73, String title, }) {并将其内部的
_hotelBGImageUrl替换为传入的imageUrl,37替换为传入的imgWidth,酒店替换为传入的title, 删除// todo: add imageUrl, imgWidth,title.备注;同
1中的操作将备注// todo: add imageUrl, imgWidth,title.的Widget _secondBGImageStack() {正行代码,替换为如下:Widget _secondBGImageStack({ @required String imageUrl, double imgWidth = 37, String title, }) {并将其内部的
_minsuBGImageUrl替换为传入的imageUrl,73替换为传入的imgWidth,民宿·客栈替换为传入的title,删除// todo: add imageUrl, imgWidth,title.备注;将
_hotelRow函数内部中调用上述_firstBGimageStack(),_secondBGImageStack()传入相应参数,修改如下_firstBGimageStack( imageUrl: _hotelBGImageUrl, title: '酒店', ), _secondBGImageStack( imageUrl: _minsuBGImageUrl, title: '民宿·客栈', ),并删除
// todo: add hotel row items的备注,然后cmd+s保存并热更新后界面应该保持不变;添加无背景图的items布局
 Widget _noBGImageStack({@required String title}) {
   return Expanded(
     child: FractionallySizedBox(
       widthFactor: 1,
       heightFactor: 1,
       child: Container(
         decoration: BoxDecoration(
           border: Border(
             left: _borderSide,
           ),
         ),
         child: _commonTitle(title),
       ),
     ),
     flex: 23,
   );
 }

 Widget _commonTitle(String title) {
   return Center(
     child: Text(
       title,
       style: _titleStyle,
     ),
   );
 }
开始替换
_flightRow()中的// todo: add flight row为如下代码;child: Row( children: <Widget>[ _firstBGimageStack( imageUrl: _flightBGImageUrl, imgWidth: 79, title: '飞机', ), _secondBGImageStack( imageUrl: _trainBGImage, imgWidth: 37, title: '火车票', ), _noBGImageStack(title: '汽车·船票'), _noBGImageStack(title: '专车·租车'), ], ),然后
cmd+s保存并热更新后界面如下:
同样替换
_travelRow中的// todo: add travel row为如下代码:child: Row( children: <Widget>[ _firstBGimageStack( imageUrl: _tripBGImage, imgWidth: 93, title: '旅游', ), _secondBGImageStack( imageUrl: _dingzhiBGImage, imgWidth: 61, title: '高铁游', ), _noBGImageStack(title: '邮轮游'), _noBGImageStack(title: '定制游'), ], ),然后
cmd+s保存
至此,本文章全部代码结束,感谢您的阅读,同时希望您能跟着自己动手亲自试验一下;
附上deom地址